To help the user get started creating their own plugins, the Assembly Copier installation comes with an SDK that includes several examples and additional descriptions.
C:\Users\Public\Documents\Assembly Copier\<Inventor Version> 15.0.0\SDK
Here you will find:
1.Help file "Naming Scheme API Help.chm". This file contains detailed information on which tools to use to develop plugins, and how to combine these tools for work purposes. You will also find a description of the classes that you can use to manipulate the data created by Assembly Copier in the program you are developing.
2.Examples of plugin projects:
▪"ExcelProductJournalDemo" – this example demonstrates one of the possible scenarios for renaming components. The MS Excel file ProductJournal.xlsx serves as a product registration log. The logbook contains a number of tables which are designed to keep a logbook for a particular category of furniture. E.g. "Wall Cabinets" or "Wardrobes", etc.
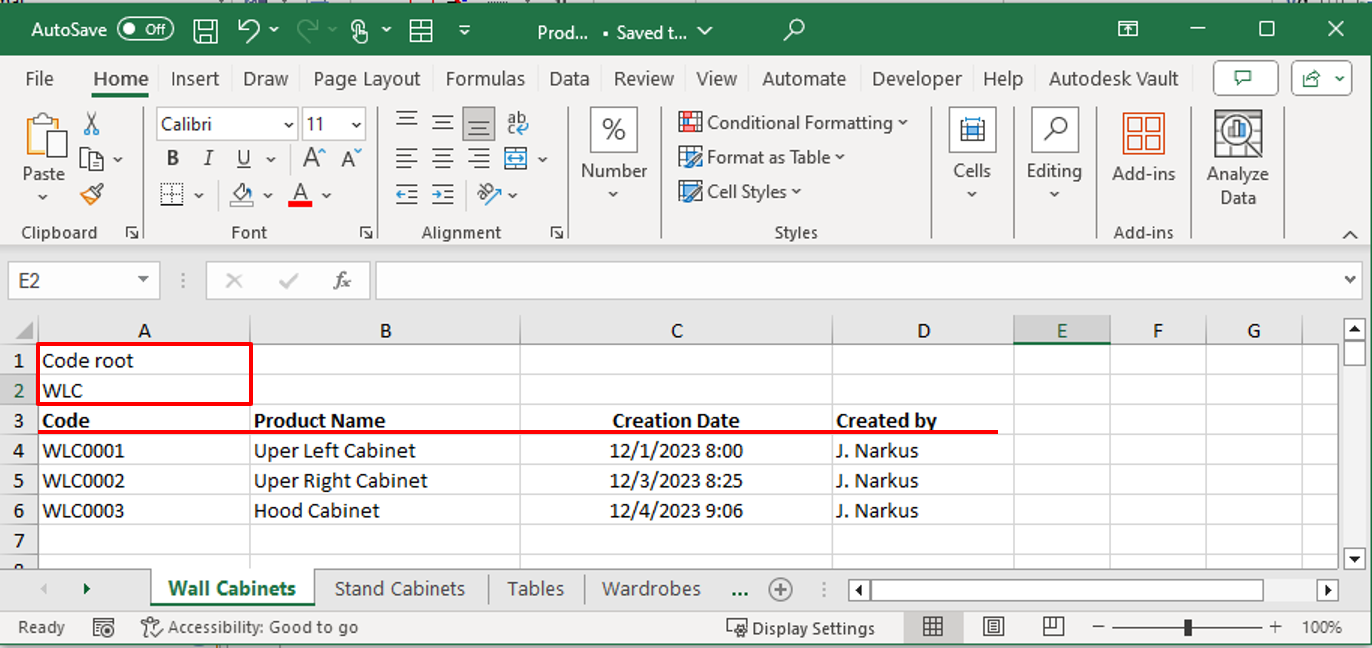
The user can enter more categories by creating new tables. Giving the table a name also sets the name of the new category. It is very important to enter the Code root field in the generated table, followed by the start of the automatically generated code, which defines the product category in the code. Also, you need to enter the table header with the columns shown in the figure.
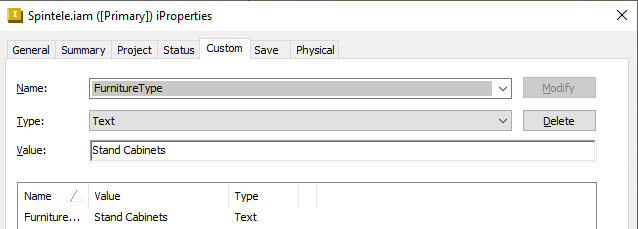
How do I assign a category to a product model of Autodesk Inventor? To do this, a new Custom iProperty – Furniture Type – must be created in the top assembly and given a value that is the same as the table name in the MS Excel file. E.g. "Stand Cabinets".
The plugin is designed so that under this category in the ProductJourna.xlsx file, it searches for a table, generates a new code and registers the copied product. This code is used to rename the components of the product in the order of the hierarchical tree.
▪"CustomPropertyUIDemo" – this example demonstrates how dialogs can be used in a plugin to create a User Interface.
.
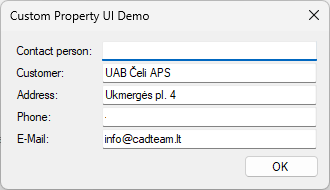
When the plugin is launched, a dialog box appears, where the user fills in the fields about the project and the client. Finally, this data will be written to the corresponding Custom iProperty fields of all the product components that the Assembly Copier program works with.